Time waits for no man...nor for me!
The diary of THE polytunnel! Be warned- Grab a drink because this is a long blog post.
I have good excuses for my recent blog silence, even if only justifiable to me. I've willingly spent months toiling away during the day in my garden, contrasted with brain-dead evenings when all I've been fit for was binge watching some great series' via Amazon Prime video. (Nicolas le Floch was most enjoyable and I'm now watching a WW1 series about ANZAC nurses.)
 |
| Polytunnel preparation! |
I am, however, very delighted with my garden makeover results. It took a couple of months of sheer mindless effort, a dollop of cash, but thankfully no actual tears. Now approaching my biblical year of three
score and ten, anything that exercises unused muscles comes to me at an aching price and pre-dinner muscle-relaxing baths have been the norm. Bath-time was also a great half-hour to catch up with reading my online newspaper on my phone and keeping up with politics!
My main garden make-over involved installing a 6 x 12 feet polytunnel, the polytunnel type chosen in the hope that one with polythene sides, buried more than 40 cm deep, will withstand stronger wind gusts and will not be wrecked, or fly away, during a heavy storm. My part of Aberdeenshire, Scotland, has experienced a lot more windy days these last few years and climate change indicators are such that increasingly damaging storms are more likely to occur than we've had during decades gone past. To my utter and naïve surprise, when I researched polycarbonate-glazed greenhouses most can only be guaranteed by the manufacturer up to wind speeds of 59 mph -
even when the metal structure is bolted down onto a concrete base.
After quite a deliberation, I ordered a 6 x 12 feet polytunnel which I hope will survive a bit longer, well buried and with a weighty border of paving slabs to further anchor the structure.
Construction began. My daughter and her husband did the building of the frame, with me holding the bags of screws and nails. (In return, I helped a little with their new polytunnel which is a humungous one- approx. 14 x 60 feet!) It’s worth noting that the polytunnel framework can be constructed on a
cold and slightly windy day but not the actual polythene cover. That had to wait
for a suitable time, i.e. almost no wind and help who were not working at
weekends.
My polytunnel was ordered from ‘First Tunnels’ on 25th Feb
2021. I also ordered wood to create staging, and 40x40cm slabs to create pathways up the centre of the polytunnel and around the outside.
 |
| A challenging site |
Preparing the polytunnel site began at the very end Feb 2021. What had been grass (actually more moss than grass), with a large oval bed in it, sloped down about 20 degrees to the south, with a slighter slope to the east. Ideally, it would probably have been easier to hire a small excavator to dig up the whole site before levelling it but access for even a small vehicle wasn't possible.
 |
| Levelling off |
I removed some of the turf at the north end of the plot to fill in the oval bed and to level off the 6 x 12 feet needed for the polytunnel. Removing turf is a tedious, heavy job but on a positive note it meant I could create a rectangular vegetable space at the northern end which is now my 'tattie' bed. (potatoes) Having marked out the site with string, I dug the trenches to either side of where the hoops would be embedded. The 'Plantex' groundsheet material went down into place and was secured temporarily with the large staples provided and some slabs to anchor it down. I then left the ground to settle.
 |
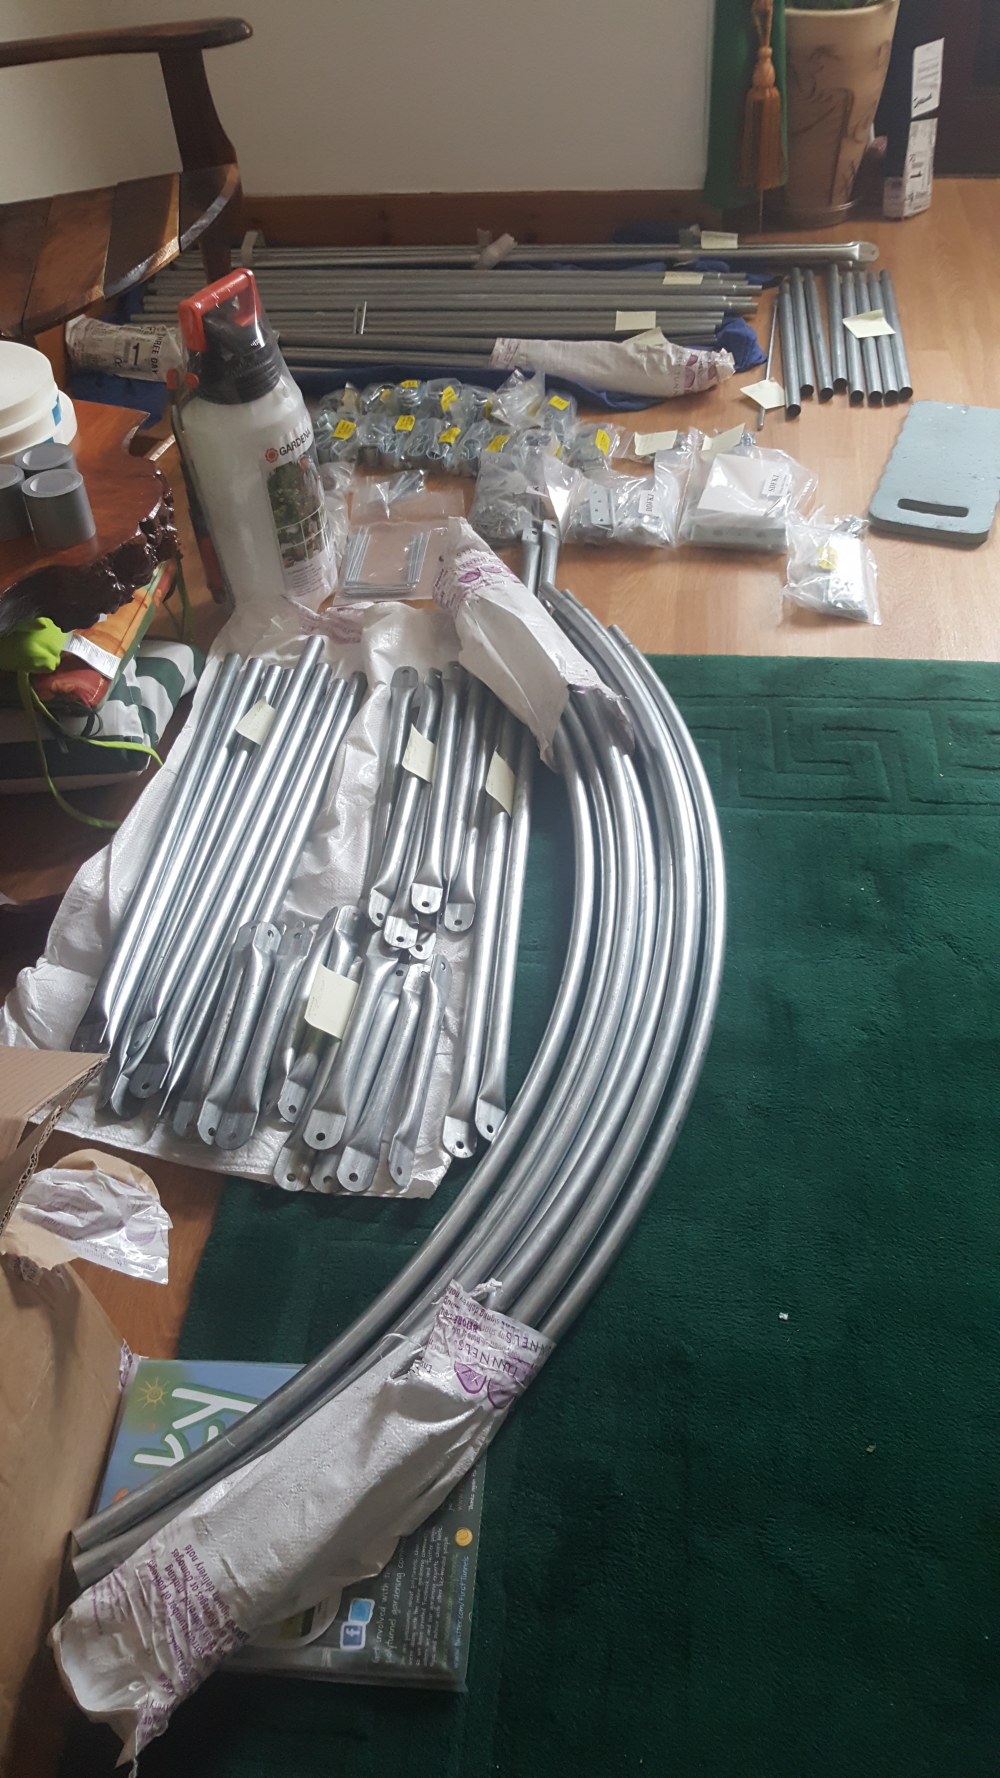
| Paving slabs! |
The wood for the staging and the slabs arrived within days of ordering, followed by the polytunnel items which came much quicker than I had anticipated (about 10 days). Much more exciting than digging up turf was opening the boxes and checking that all the components had arrived. I give more than 5 stars to First Tunnels because the order was faultless and was so well organised in very well labelled pieces, bags of screws etc. The packing list enclosed was so easy to use for checking! The slight downside was the bits had to be housed in my hallway for weeks till they were needed.
 |
| Well-labelled components |
My joinery skills are very basic but the wood for my staging was cut, holes drilled and screwed together during a couple of afternoon sessions.  |
| 2 completed staging benches! |
In addition to the garden work being done outside, I sowed lots of vegetable seeds and raised them in my dining room: tomatoes, peppers, cucumber, courgettes, herbs and some flower seeds like dahlias and geraniums.
Then came the day that my 'help' was available to get the polytunnel frame constructed. The nominated day was clear but only about 5 Deg C, so working outside was pretty cool.
 |
| Polytunnel frame installation |
The framework had to stay like the above photo for the following weeks till a suitable opportunity arose for getting the plastic cover on. That didn't mean I could get back to my desk immediately because I had lots of other outside work planned.
 |
| Montbretia choking my lavender |
What had been a lavender hedge had been taken over by crocosmia bulbs. I love my Montbretia variety but it's such a vigorous grower it had to be stripped out of two long beds during early March. That was backbreaking work over the best part of a week. I removed about 16 large bags worth of unwanted bulbs. Having advertised the bulbs FREE to local people, I managed to donate only 1 bagful. The remainder went to the garden recycling centre.
 |
Excavated Montbretia bulbs |
Other garden improvements/changes were made to one enormous silver birch tree that was more than 60 feet in height and around 50 years old; three large holly trees; and one rowan that could possibly be a couple of hundred years old. I adored the silver birch but it was becoming a height hazard every time we had high winds and too dangerous because of the proximity of the neighbouring houses. Tackling the trees was work for professional tree surgeons. The hollies were drastically reduced in size and given a re-shaping and the birch was removed to ground level (sob, sob). That work was done by a crew of three men over 3 different days. I'm delighted with the holly improvements but I'm still feeling highly guilty about having to remove my lovely silver birch.
 |
2 of the holly trees before pruning
(1 variegated and 1 not)
and one silver birch |
Normal weeding and splitting plants too large for their containers took up some time, as did potting up my old chimney pots that were replaced last year. The 6 cracked but very decorative chimney pots are now strategically dotted around and look fantastic. Potatoes and other vegetable seeds were popped into the veggie beds and then came the day the plastic cover went onto the polytunnel frame.
 |
| Polytunnel plastic cover in situ! |
The inside path was laid, the landscaping around it came next. That took weeks and lots of effort. Removing the grass and moss from the whole area was essential, since I don't want any of it to surprise me in the coming years by re-growing through the breathable groundcover that went below the slabs and granite chips! Backbreaking stuff, riddling out the moss and grass clumps, but after days of effort I had my new vegetable beds created to both sides of the polytunnel and bordered with heavy wooden beams. Thankfully my electric jig-saw blade was sufficiently wide to saw the pieces, when necessary, to fit the spaces.
 |
Wooden edging going in-
my potato tubers now well sprouted! |
 |
A proud moment when I finished the rectangular bed
that was levelled on that slight slope! |
 |
Vegetable seeds and onion sets now growing nicely
in the beds created last year |
 |
| Finished! |
From this angle it looks like a huge sparse space but it's not really. A few more strategically placed tubs will round the space off nicely. I'll have to see what the garden centre might have to fit the bill!
 |
Tomatoes, cucumbers, courgettes
growing well |
My capsicum peppers didn't survive the move from the dining room out to the polytunnel, poor root growth, so I now have new seedlings on the left hand staging along with various herbs.
And to enjoy sitting outside to write during July and August, I spent two days double-varnishing my outside table set so that I can appreciate my lovely summer garden.
 |
| Varnish does the trick! |
I now intend to post loads of colourful plants photos of my garden beauties- on here and on my Facebook page.
Is it rest time yet? Yes- but only after the weekly weeding session that is absolutely necessary (still battling with horsetail weed). The watering and feeding when it is dry. Oh, and thinning out my carrot, kale, beetroot...you name it seedlings that are growing nicely.
And in timely Wimbledon fashion, my strawberries are just beginning to turn red!
Updates to follow... on the produce.
Slàinthe!


No comments:
Post a Comment
Thank you for reading my blog. Please pop your thoughts about this post in the comment box. :-)